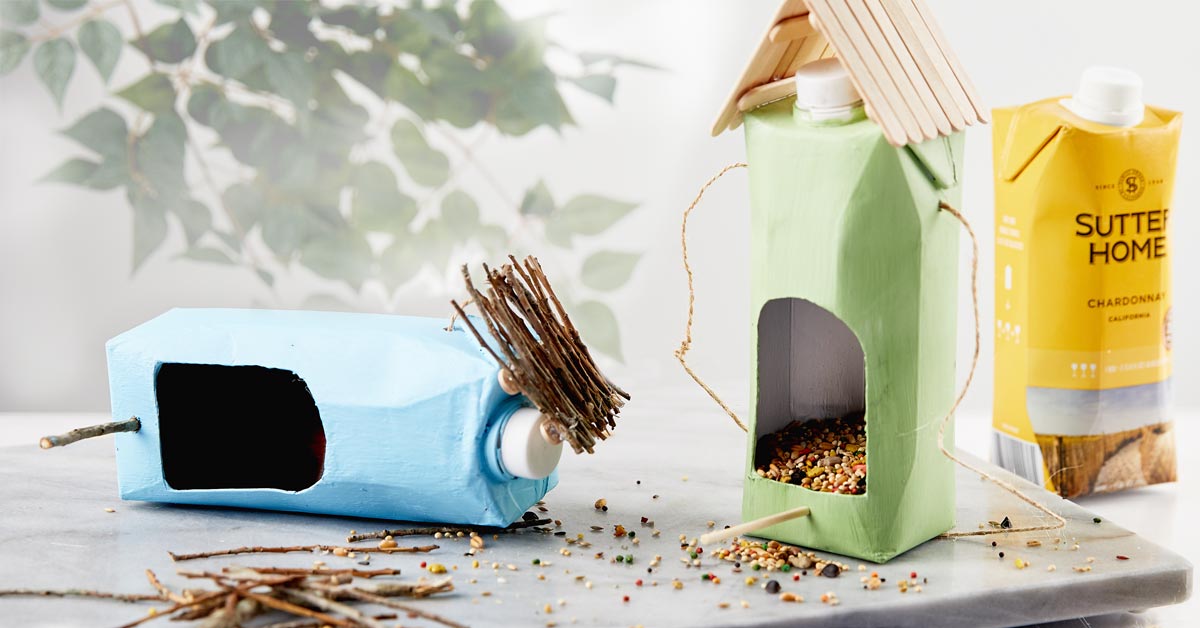
Re-use your Sutter Home Tetra Paks® as DIY Birdhouses

At Sutter Home, we care about the environment, and we know that you do too. That’s why you love our Twist & Go Tetra Paks®. They are easy to store, share, and take along on whatever adventures you may pursue. They also help lower your carbon footprint, so it’s packaging that you can feel good about.
Reduce your footprint even further by making these cute and simple Tetra Pak® Birdhouses & Feeders. This is a DIY project that you can feel good about. Not only are you helping to reduce garbage by reusing your Tetra Paks®, but you are helping to keep the birds happy and well fed. The birds and earth will thank you, while you enjoy the pleasant view of birds perching in your backyard.
Here’s what you’ll need:
- Sutter Home Twist & Go Wine Tetra Pak®(empty and washed)
- Utility knife
- Paint (any color or type you desire; we used acrylic paint)
- Paintbrush
- Hot glue gun and glue sticks or crazy glue
- Twine
- Twigs, wooden craft sticks and/or small wooden dowels (your preference)
- Birdseed
Here’s how to make it:
- Make sure your Sutter Home Twist & Go Tetra Paks® is empty and thoroughly washed out.
- With the utility knife, cut an opening for the birds to get the birdseed.
- You can create a pattern or cut it freehand; just be sure to allow space for the birdseed to stay in as well as space for the perch.
- Paint the outside of the Tetra Pak® and give it time to dry. You may want to apply more than one coat to get better coverage. To make the paint dry quicker, use a hairdryer to speed things up.
- While the paint is drying, it’s time to start with the roof. You can forage for twigs if you desire a natural look or use wooden craft sticks for a traditional roof look. Determine the height and width you desire for each side of the roof (we used the length of a small wooden craft stick as the width for both the natural roof and the traditional roof) and gather the necessary amount of twigs or wooden craft sticks to create your roof.
- Apply hot glue to a crossbar and lay your twigs or sticks perpendicular to the crossbar, giving a little room at the top. Once the glue has hardened, apply glue to another crossbar and attach it roughly 1 to 1.5 inches below the first crossbar. Allow glue to harden. Make another roof side.
- Now that the roof sides are ready and the paint is dry, it’s time to attach the roof to the carton. Run a bead of hot glue along the top edge of a side, rest the lower crossbeam on the glue; and angle the roof side so the top edge is over the middle of the Tetra Pak®. Hold in place until glue hardens. Repeat for the other side of the roof, so the tops come together to create a roof shape. If necessary, apply a little hot glue where the two tops meet to hold them together.
- With the utility knife, cut a small hole just below the flaps on either side for the twine to feed through and create a loop to hang on a branch. Feed the twine through the hole and tie a large knot to keep the twine from pulling back through. Do the same for the other side.
- Cut a hole for the perch between the bottom of the carton and the bottom of the opening in the middle of the front. Insert a twig or dowel, making sure it is stiff enough for a bird to sit on.
- Fill with birdseed, hang on a branch, and enjoy.
You just helped save the earth. You deserve another Sutter Home’s Twist & Go Tetra Pak® to celebrate!
For more ideas on Sutter Home’s Twist & Go Tetra Paks®, check this out.


